Wednesday, October 10, 2007

Treat Bags!

I've finally taken the time to snap a few pictures and get them uploaded! The craft show is fast-approaching, so I've been focused on being creative!
Hope you enjoy the pics! Comments & suggestions are welcome! (Also check out my new "The Jackson's" blog I'm slowly putting together!)


I started out by making treat bags out of paper bag lunch sacks. I thought they were cute until...


...I saw this style of bag on Ashley's blog & had to find some to get creative with! I love the windows, and the bags are lined, so you can fill them with cookies or munchies & you won't have to worry about greasy spots showing through!

Journals

A few weeks ago, my friend Darci gave me a tip that Target was selling composition notebooks for 12 cents a piece! Of course I had to run out there and fill up my cart! Following are a couple of projects I've put together...


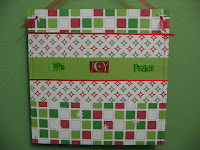
This holiday planner is divided up to help get your holiday plans in order! Some of the tabs include: Calendar, Gifts, Cards, Recipes, etc. I also added a little pocket inside the back cover for stamps!


Wouldn't this make a great teacher's gift?? I hope my craft show customers think so! :-)

Cans!

Here are some of my altered paint cans. I have used too many different papers and embellishments to list! (I hope to get better about listing my materials in the future!)


These are my quart-size cans. Aren't they cute? They are the perfect size to sit on your desk and fill with candy or pens/pencils.

The following cans are all gallon size. I decided to make a matching card to include with each of the gallon size cans...


I think this set is my favorite so far! Makes me think if chocolate! The card has the word "Friend" on the front. I included a close-up for you to see.

I want to have some fall goodies for the craft show...so this is the first "Fall" can I've come up with...I found the scarecrow stamp at a garage sale for $2!!


This is what I ended up doing with the "Baby" can I asked for advice for in an earlier post. Just some simple white ribbon attached to the handle. I think it looks a lot better in person than in the picture!

Tuesday, September 18, 2007

I'm back! It's been a crazy couple of weeks! School started on 9/5, and we are just now starting to wind down and get into a schedule again...which means that I have had time to get back to my paper crafts! It's about time...I only have about 1 month until the Algona craft show! Time to get craftin'! Following are some of my recent completed projects...
The pic is fuzzy, but I really love how this note holder turned out. After I bought the paper, I found coordinating ribbon to add - bonus!

It's hard to tell by the picture, but the colors in this note holder are one of my favorite color combos: pink & brown.
I think this is one of my favorites so far - I love the two patterns together - plus you can't beat multi-colored dots!


Isn't this a fun Christmas card holder??


Here's another Christmas card holder - I think the snowflake detail in the corner is cute!

Finally...here are some of my cans! They are fun to do! I really like the baby can, but think it's missing something around the handle...any ideas?


Sunday, August 12, 2007


Today I was going through my piles of paper, trying to find inspiration for my first attempt at embellishing paint cans. I first came across this brown and pink paper that has always made me think of candy - like taffy, or chocolate bon bons! So I came up with this fun "Sweets" can. It was so much fun to make! Then I moved on to my Christmas paper and came up with my first (of hopefully many) Christmas can.


After putting together the Christmas can, I still had some Christmas Spirit in me, so I made a few cards. Happy Christmas in August!!

Friday, July 20, 2007

We're In!

DKS Paperie (Darci, Kim & Sue) have been selected for our first juried craft fair in Algona, Iowa on October 27 (1 week after Arkansas!)! We each had the same reaction upon hearing the news: first elation, and then a bit of a shock. We have SO much to do!!

Following are a few projects that I've been working on lately, which I hope to include in the show:

These two note holders were really simple to make out of cardstock, ribbon and misc. embellishments.


Following is a monogram card set that I put together. The set consists of the 4 cards shown in the first pic, that are placed in the decorated box in the second pic.


Sunday, July 15, 2007

My Finished Craft Room!!

This weekend Steve and I finally put the finishing touches on my craft room!!
The room was painted nearly 1 year ago, and curtains were hung a few months ago, but there were a few little details that we'd been putting off...

Here is a shot from the doorway. I arranged my table so I can work on 2 sides of it. This way I can always have my sewing machine handy.


This is a shot of the newly updated closet. We put in 2 new shelves to provide storage above & below, and work space in the middle. We took off the door to open up the space. I used a curtain rod & hung some coordinating fabric on the bottom half to cover up the storage area below.


This is a close-up shot of my work area in the closet. The shelf we installed is extra-wide, so I can have a place for projects to dry, do some embossing (there's a plugin in the closet!), and whatever other misc. tasks I want to do away from my work table. I covered the back wall with leftover fabric.


This is a close-up of the peg-board behind my work table.


This is the wall on the opposite side of the room from my work table. This is where I'm storing all of my rughooking supplies and wool.


Finally, this is a picture of a side wall. I'm storing misc. craft notions, pictures and my paper crafting and rughooking books on the shelves. My Sizzix stuff is on the wire shelves, and I store my paper in the shelving unit I picked up at a garage sale in Arkansas.


Hope you enjoyed my craft room...I know I will!

Friday, July 13, 2007

Craft Show Pics

My friends Darci, Sue and myself are going to attempt to sell our paper crafts at a craft show this fall. Following are a few pictures of a small display that we photographed to submit with our application. Most of the cards and the cute calendars are Darci's (check out her blog - click on the "Darci's Designs" link) She also does really great custom-made cards...


...the hanging "Notes" holder is something I whipped up after I got my newest "PaperCrafts" mag this week...


...here you can kind of see one of my notepads (w/the ghost), I also made a paper bag album (inside the basket), and the "Family" album. I'll post more detailed pics later.

Sunday, July 8, 2007

Splashin' Dogs!

Since it's so hot here lately, and because of Kersee's love of chasing water from the hose, we decided to purchase a small swimming pool for the pups. As you can tell from the pictures, they loved it splashing around in the cool water!

Kersee enjoyed making the water splash as he tried to dig and see what was below the surface.


Belle didn't know what to think - should she play and dig? Or drink the water? As you can tell...she did both!

Saturday, July 7, 2007

Rughooking

Rughooking is a craft that I learned from Steve's Aunt Ginger, from Arkansas (yes, my Arkansas aunt taught me to be a hooker!). I've enjoyed taking old wool strips and creating beautiful pieces of primitive art from them. Many of you have probably heard of latch-hook, which uses canvas and yarn. Rughooking is similar, but also quite different. I use a base fabric of burlap, monk's cloth, or linen, and use cut wool strips to hook my designs. Unfortunately, I have not done as much "hooking" as I would like...but I have 2 projects I'm currently working on, and plan to post my progress as I go.

Following are some of my completed projects...

This is the very first rug I completed. Back then I used a quilter's hoop and hand cut my wool. I have since added a sturdy frame and wool cutter to my rughooking supplies.


This is by far my favorite creation so far...primarily because it's the most personal rug I've completed. I purchased a pattern of a dog drawn on burlap. I then took a picture of our dog Kersee, and customized the rug to look like him...right down to the bright orange collar. Once the hooking was complete, I turned it into a pillow. It was a lot of fun.


This is the first pattern that I drew on monk's cloth. I got the idea from a Christmas card we received one year. It was quick to hook up, and I had a lot of fun with it. You can't see it in the picture, but there is a swirly detail that makes the snowflakes come alive!


This angel rug I made for my mom. I bought the pattern in Eureka Springs, Arkansas, and think it came together nicely. Thanks to Ginger, I was able to use some beautiful dyed wools that she had on hand.


This is another rug that I designed myself. I got the inspiration from my brother-in-law Billy Curry, who recently completed his teaching degree. The schoolhouse was fun to do. I gave it to Billy and Sandy for Christmas a few years ago.